Monday, December 26, 2011

New Year's Traditions - Day and Eve

In the South, there are certain foods that are must-haves on New Year's Day.  They are, of course, black-eyed peas and greens.  The beans represent coins and are considered to bring you good fortune in the coming year.  The greens represent the folding or paper money you will receive during the year.

How black-eyed peas became a traditional southern food is up for debate.  One school of thought says that they were originally grown here as food for livestock and became a staple only after Sherman's troops passed them up as unsuitable to eat.  However it came to be, they are a delicious tradition we look forward to every year.  These are my recipes for these holiday favorites.

Black Eyed Peas

1 lb. Dried Black Eyed Peas
1 large meaty ham bone or smoked ham hocks (I use the bone from the Honey Baked Ham we have on Christmas Eve – throw it in the freezer until New Years)
1 large onion, chopped, preferably Vidalia
Salt
Pepper
Red Pepper Flakes
I can feel the good fortune coming!

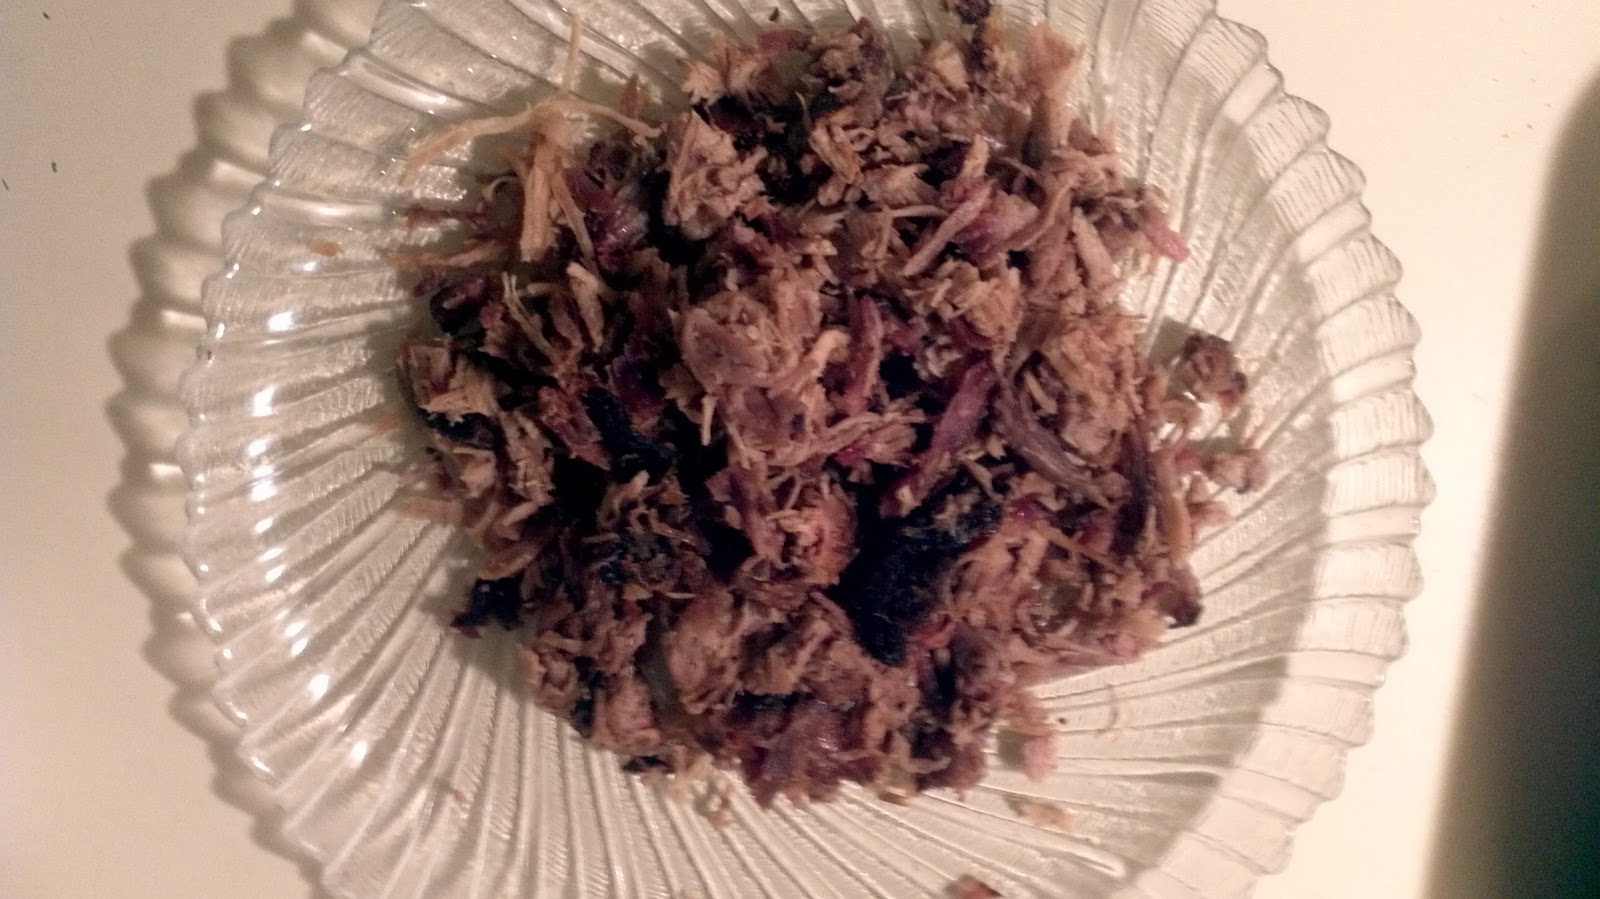
Sort and rinse peas and then soak overnight. Drain peas. Add ham bone or hocks to large pot with 6 cups water. Add onions and peas. Add a tablespoon of salt (more or less to taste) along with pepper and red pepper flakes to taste. Bring to a boil and then reduce to a simmer for 2 hours or until peas are tender. Add water as needed.  Remove the ham bone and chop up all of the meat and add it back to the peas.

Turnip Greens with Smoked Turkey

1 lb Turnip Greens or other greens of your choice
Smoked Turkey Wing (Ask your butcher to order one for you if you don't see them in the meat department)
Salt to taste
1 tsp sugar – essential to counteract bitterness
Black pepper
Cayenne Pepper
Smoky, Spicy Deliciousness!

A required condiment
for greens


Bring 6 cups of water to a boil and add turkey wing. Boil wing for 10 minutes and then add greens, salt, sugar and peppers. Cook on low for an hour or so until greens have softened to your taste. Remove the wing and take the meat off the bone and add back to the greens.  Serve with pepper sauce. 

If you don't have a wing, just start with broth instead of water.


You have to have cornbread with these dishes, so I am including my recipe for cornbread.  This recipe makes the most delicious, moist cornbread that is perfect for sopping up the pot liquor in the greens.

Best Ever Cornbread

1 cup melted butter
1 tablespoon sugar
4 eggs
1 15 oz. can of creamed corn
1 4 oz. can chopped green chilies (optional)
1/2 cup each shredded Monterrey jack and sharp cheddar
1 cup flour
1 cup yellow cornmeal
4 teaspoons baking powder
1/4 teaspoon salt

Preheat oven to 300 degrees.  In a large bowl or mixer, beat together the butter, sugar and eggs.  Stir in creamed corn, chilies and the cheeses.  In a separate bowl, combine flour, cornmeal, baking powder and salt.  Add the flour mixture into the liquid mixture, stirring thoroughly to combine.  Pour mixture into a lightly greased  9 x 13 pan.  Bake for one hour or until a toothpick inserted in the center comes out clean.


The perfect side for peas and greens 

Tom and I have another year end tradition.  For about 15 years now, we have Oysters Rockefeller on New Year's Eve.  First served at Antoine's in New Orleans in the late 1800's, the dish consists of oysters on the half shell baked with a spinach, bacon and parmesan topping.  While the original recipe didn't include spinach but other pureed vegetables, this variation of the recipe is delicious and perfect for celebrating.

Oysters Rockefeller

Rock Salt
6 tablespoons butter
1/4 cup chopped green onions
1/4 cup finely chopped celery
6 cups chopped fresh spinach
3 tablespoons chopped parsley
1/2 teaspoon minced garlic
generous pinch kosher salt
black pepper
6 tablespoons dry bread crumbs
1/4 cup freshly grated parmesano-reggiano
2 dozen oysters, shucked and drained
1/4 cup dry sherry
Lemon juice & Hot sauce
6 slices bacon, cooked until crispy and crumbled
2 tablespoons chopped pimentos

Layer a jelly roll pan with rock salt to give the oysters a bed to rest on.

Saute green onions and celery in butter until tender.  Add spinach, parsley, garlic, salt and pepper and cook over low heat for about 10 minutes until tender.  Remove from heat and add breadcrumbs and cheese, stirring to combine.

Arrange oysters on the bed of rock salt.  Brush each oyster with a little sherry and then add a few drops of lemon juice and hot sauce to each oyster.  Top each oyster with the spinach mixture and then top with the bacon and pimientos.  Bake at 350 degrees for 20 minutes.  This recipe serves four but can easily be halved to serve two.
These are delicious washed down with champagne!

These oysters are a rich, savory treat that are worthy of their fancy name.  I can't imagine New Year's Eve without them.

P.S.  I want to send a shout out to my hubby Tom, my oyster shucker.  I couldn't make these without you. I can't wait to spend another New Year's Eve with you. 

Sunday, December 18, 2011

The Great Tortilla/Fish Taco Experiment

My First Tortillas!


It has gotten increasingly difficult to find decent tortillas at the grocery store so I have decided to try my hand at making them at home.  My first attempt several weeks ago was corn tortillas.  That was such a disaster I am still not ready to talk about it.  However, enough time has passed that I am willing to attempt flour tortillas.


Most traditional flour recipes have alot of fat in them so I began searching for a lower fat recipe online.  I couldn't believe how many recipes called for lard.  If I begin cooking with lard, I am sure to give my endocrinologist apoplexy.  Finally, I settled on a recipe I found on About.com.  I was pleased with the results so I thought I'd share it.


Flour Tortillas


1 3/4 cups all-purpose flour
1/2 tsp. salt
1/4 tsp. baking powder
1/4 cup shortening
1/2 cup very hot water


Combine the first three ingredients in a large bowl, whisking to combine.  Add the shortening and begin to work it into flour using a pastry cutter or a fork until the crumbs are the size of peas.  (Since my pastry cutter has somehow gotten legs and I am way too impatient for the fork method, I used my food processor.  Just throw in all the ingredients and pulse until desired consistency.)


Tortilla Press - I got mine at Bed, Bath & Beyond
of all places
Pour in the hot water and stir with a fork to combine. Pour mixture on a lightly floured surface and knead with your hands for 3-4 minutes to form a smooth dough. Place back in the bowl, cover with a towel and let rest 15 minutes.

Divide the dough into 8 balls, and roll between your palms to make as smooth as possible. With a rolling pin, roll out each ball of dough into a thin circle about 6-7 inches across. (I used a tortilla press to shape the tortillas and then rolled them to get the desired size/thickess.)

Preheat a dry cast iron, or non-stick pan over medium-high heat. Place the tortilla in the hot pan and cook for one minute, or until small air bubbles appear. Flip over and cook for another minute, and then finish by flipping over one last time for another minute. During the third minute the tortilla will usually puff up, and small browned spots will form on the surface.

I was concerned about what I thought was a lack of flexibility in the tortillas but discovered that 12-15 seconds in the microwave did the trick.  The result is a soft, pillowy tortilla with a chewy texture.  Just what I was looking for!

Now armed with tortillas, the question is what to make to go with them.  I decided to try my hand at fish tacos.  I have had them at restaurants a few times and thought "I can do this."  You can either grill or fry the fish.  Despite the aforementioned apoplectic endocrinologist, I decided to go with fried.  A beer batter made with Mexican beer should do the trick.


Dos Equis Beer Battered Fish Tacos

1 ½ cups all purpose flour
2 tsps. Garlic Powder
1 tsp. cayenne pepper
Generous pinch kosher salt
Black pepper to taste
1 beaten egg
1 12 oz. Bottle Dos XX beer
Tilapia filets
Flour tortillas
Jalapeno Slaw (Recipe follows)
Salsa Verde (Recipe follows)
Lime-Cilantro Crema (Recipe follows)
Queso Fresco

At least two hours (or even better, the night before) before making tacos, prepare the Jalapeno Slaw.  Just prior to frying fish, prepare the Salsa Verde and Lime-Cilantro Crema. 

Stay thirsty, my friends.
Preheat oil in a deep fryer to 365 degrees.  Alternatively, heat 2 inches of oil in a heavy-bottomed pan to 365 degrees. Combine first five ingredients in a large bowl.  Add egg and beer and stir with a whisk until smooth.  Cut tilapia into 1” wide strips.  Dip in batter to thoroughly coat, allowing excess to drip off.  Drop slowly into hot oil and fry for about 2 minutes until golden brown.  Drain on paper towels.

Queso Fresco is a crumbling cheese that tastes
similar to a mild feta cheese
To assemble a taco, heat a tortilla in the microwave for 15 seconds.  Put a generous ¼ cup of Jalapeno Slaw on the tortilla. Lay one or two strips of fish on top of the slaw.  Top the fish with some Salsa Verde and Lime-Cilantro Crema.  Finish with a tablespoon or so of the Queso Fresco. 

Try setting up a taco bar and let everyone assemble their own.  Alternative toppings could be Pico de Gallo, other types of cheese or guacamole.


Ta Dah!

Jalapeno Slaw

1 bag Angel Hair Coleslaw
1 large fresh jalapeno, seeded and minced
5 green onions, sliced
¼ cup apple cider vinegar
3 tbsp. Honey
Generous pinch kosher salt
Black pepper to taste

Combine cabbage, pepper and onions in a large bowl.  In a small bowl, whisk together the vinegar, honey, salt and pepper.  Pour over the cabbage mixture and toss to coat.  Refrigerate for at least 2 hours before serving.

This slaw is delicious on its own.  It would bring a slaw dog to a whole new level!

Salsa Verde

½ lb. tomatillos
Cilantro
1 fresh jalapeno, seeded and chopped
1/3 cup chopped onion
Kosher Salt

Boil tomatillos in salted water for about 8 to 10 minutes until tender.  Drain off the water and place the tomatillos in a blender or food processor.  Let cool for about 10 minutes before blending.  (I know from experience if you turn on a blender with hot liquid or food in it, you’ve got yourself a blender bomb!)

Salsa Verde
Add a generous handful of cilantro to the blender along with the jalapeno and onion.  Pulse a few times and then blend until smooth.  Taste the salsa and season with the salt to taste.  I like this salsa best at room temperature. It is also delicious on chicken enchiladas or shrimp fajitas.

Lime-Cilantro Crema

1/3 cup Mexican Crema

Look for Crema in the Dairy case

Juice of ½ large lime
1 tbsp. minced cilantro

Combine all ingredients in a small bowl, whisking until smooth.  If you can’t find Mexican crema, you could use sour cream.


My conclusion on this experiment:  Success!  The tacos tasted so fresh and had wonderful texture coming from the chewy tortilla, the crispy slaw and fish and the creaminess of the queso fresco.  I will definitely make these again.

Monday, December 12, 2011

Barbecue is not a Verb


Our latest find!
 Every Southerner knows that the word barbecue is not a verb; its a noun.  In the South, the word barbecue means the results of cooking meat low and slow in a pit or a smoker.   Barbecue can mean different meats in the various regions of the South.  Barbecue in Texas almost always means beef, in St. Louis it means ribs, and here in Georgia, it definitely means pork. 

Tom and I often smoke our own barbecue, but its still nice to have a local restaurant to fall back on.  After Blackstock's in  Lawrenceville closed, we were at a loss for where to go.  Our choices were the local restaurant down the street (not good) or a chain (not authentic).  I Googled "barbeque lawrenceville" and up came Ray's Hot Wings.  I checked out their website and learned that they are family-owned and have been in business in the Lawrenceville area for over 15 years.   They specialize in hot wings and hot dogs but also offer seafood and barbecue.  I am all about supporting local businesses, so we rolled the dice and gave them a try Friday night.

Wall Art

The exterior of the restaurant is non-descript.  They have patio seating that would be nice in the Spring.   Inside, the first thing I noticed was that the place is spotless.  It has a few tables but most of the people were ordering to go, as we were.  You place your order at the counter and then take a seat and wait while they prepare your order and bring it out to you.  The service was friendly but a little slow.  We ordered an order of fried green tomatoes, a pound of pork and a quart of Brunswick stew.

Order up!

The fried green tomatoes were good, with a tasty batter and ranch dressing for dipping.  They were red hot out of the fryer so we know they were made to order.  (I would have taken a picture of them but Tom and I scarfed them down in the car.)


Yummy, porky goodness!

The barbecue was delicious!  The meat was moist and tender and perfectly smoked.  There were chewy bits of the bark (the crust that forms on long-smoked meats) mixed in for textural interest.  They sent two sauces with the meat.  The first was a sweet sauce similar to a bottled sauce that was okay, but not for me.  The second sauce was a vinegary hot sauce that is reminiscent of Backfire, the hot sauce offfered at Country's Barbecue in Columbus and Montgomery.  We like that sauce so much we have ordered cases of it and given it as gifts.

Now for my litmus test for a good barbecue joint:  the Brunswick stew.  If a restaurant's Brunswick stew is not up to par, the whole restaurant is disqualified by my standards.  Ray's stew was fantastic with shoepeg corn, tender butterbeans, potatoes, tomatoes and of course, chopped pork throughout.  It has a smoky flavor with a little vinegary twang from a healthy dose of hot sauce.

They passed the test!

Ray's offers over 20 flavors of wings and a wide variety of hot dogs, including Chicago dogs.  (My friend Susan - a native Chicagoan - will be happy to hear that!)The menu also includes fried fish, shrimp, burgers and po boys.  The sides are typical of a barbecue restaurant with a few soul food favorites like collard greens also featured.  I don't know when I will be able to speak to the quality of all of the other items, as I believe I will always have a hard time ordering anything but barbecue.

I hope that you will give Ray's a try.  They are located in Lawrenceville on Hwy. 120 between Lawrenceville-Suwanee Road and Riverside Parkway.  Let me know if you try anything else on the menu!

Tuesday, December 6, 2011

Got Carcass?

It amazes me that so many people throw out their Thanksgiving turkey carcass every year.  You can get at least two more meals out of it if you turn it into turkey soup.   I love this soup so much I will cart home the carcass from  my in-laws every year and have been known to take home the carcass from covered dishes at work if they'll let me.  I remember one year at KSA, when my friend Debbie Lapp looked at me like I was an idiot for freaking out over her throwing the carcass in the trash after our Thanksgiving lunch.  The next time I made soup I brought in a bowl for her to try.  Now she understands.

Lisa's Turkey Carcass  Soup (I know that sounds gruesome but I don't know what else to call it)

1 meaty turkey carcass
1 large onion, quartered
(One note here:  if you are using yellow or vidalia onions, leave the skins on.  Just rinse them and then quarter them.  The yellow skins on the onions will impart a nice golden color to the broth.)
2 garlic cloves, crushed
8 cups water
Generous pinch kosher salt
1 tbsp. chicken bouillon granules
2 cups canned chopped tomatoes
1 cup sliced carrots
1 cup sliced celery
1 cup sliced mushrooms
1 heaping tsp. dried basil
1 1/2 cups egg noodles

Put the carcass in a stockpot with the onion and garlic and cover with the water.  Add the kosher salt and cover and bring to a boil.  When it reaches boiling, lower the heat and simmer, covered, stirring occasionally for an hour.
Everybody in the pool!

After the soup has been simmering an hour, carefully remove the carcass and set it aside to cool.  It will have fallen apart by this time, so be sure to get all the bones and meat that may have fallen off the bone.  Line a strainer with cheese cloth and pour the broth through the strainer into another large pot or bowl.  Discard the solids.


Strain the broth to catch all of the little bones and or skin
that's left behind.  This is an important step, don't skip it.

Return the broth to the pot and taste for seasoning.  If salt is needed, or you want a stronger poultry flavor, add the chicken bouillon.  This can depend on how you originally prepared your turkey.  If you brined it, it may not need it. Add the tomatoes, the vegetables and the basil and return to a boil. Lower the heat, cover and simmer for 15 minutes.

While the soup simmers, it's time to pick the carcass.  I can't really tell you how this is done because I have never done it before.  That's what husbands are for!  I can tell you that about two cups of bite sized pieces of turkey is what you are looking for.  If you need to supplement it with some leftover turkey to get that, do it.

After the soup has simmered for 15 minutes, throw in your egg noodles and cook for an additional 10-15 minutes until the vegetables are tender and the noodles are cooked.  Add the turkey and heat through.  Serve this with some crusty bread or biscuits to soak up the yummy broth.


Gallons of turkey goodness!

I usually have two turkey carcasses (my mother-in-law's and mine) so I make a double batch.  I put the leftovers into plastic mayonnaise jars and freeze them.  Then we have a quick, comforting meal on  hand for a fast weeknight dinner or weekend lunch.

There are several ways you can change this recipe in order to make it your own.  You can change the vegetables or substitute some cooked rice for the noodles.  You could change the spice choices, substituting curry powder or paste to make more of a Mulligatawny type soup or use cumin and cilantro for a tortilla soup. 

Hopefully this will inspire you not to pitch your carcass ever again and to be creative in  the kitchen. Enjoy!

Monday, December 5, 2011

Sausage Cornbread Pecan Dressing

After I posted about brining my turkey, my big sis asked if I would post my dressing recipe, so here it is.

1 pkg. sausage links
2 tablespoons butter, if needed
1 cup chopped celery
1 cup chopped onion
1 cup chopped green peppers
1 pan of cornbread, crumbled – (I use Martha White Cotton Pickin’cornbread mix but if you are feeling ambitious, make it from scratch)
6 cups Pepperidge Farms seasoned stuffing
1 tsp. poultry seasoning
1 cup pecan halves
3 cups chicken stock, approximately (You will need to eyeball this, if you need more, add it)
Generous pinch of kosher salt
Black pepper
3 eggs, beaten

Preheat the oven to 350 degrees.  In a large skillet, cook the sausage according to package directions until done.  Set aside on a paper-towel lined plate.  You will use the sausage drippings to sauté the celery, onions and bell pepper.  If there aren’t enough drippings to properly sauté the veggies, add some butter.  Add the veggies and sauté until soft but don’t brown.

Cut sausages into ½ inch pieces and combine with the sautéed veggies, cornbread, stuffing, poultry seasoning and pecans in a large bowl. Add the stock a cup at a time until it is very wet.  Since this is dressing and not stuffing, it needs the extra moisture or it will dry out.  Add your salt and pepper and then the eggs, stirring to combine. Pour mixture into a 13 x 9 x 2 pan that has been sprayed with Pam.  Bake at 350 for about an hour until firmed up and toasty brown on top.

I didn't know I would be posting this recipe so I didn't take a picture
but here it is featured in an open faced turkey sandwich.
Later this week I will be posting my recipe for Turkey Soup.  Enjoy!

Sunday, December 4, 2011

Retro Steakhouse Revisited

Last night Tom and I took advantage of the beautiful crisp, clear weather and threw a  couple of bacon-wrapped tenderloin steaks on the grill.  To accompany the steaks, I prepared my take on some steakhouse favorites.

First, the cocktails.  Nothing goes together like beef and bourbon.  Bourbon and water is good, but I like a little something extra, so I go for a Manhattan or an Old Fashioned.  Last night it was Old Fashioneds.  A simple, classic cocktail that will put hair on  your chest!

A Muddler - A must for a
well-equipped bar
Old Fashioned

2 oz Bourbon - I prefer Jack Daniels
2 dashes Angostura Bitters - Look for this in the mixers section of the store
1 splash water
1/4 heaping  tsp powdered sugar
1 marashino cherry
1 slice orange
In an Old-Fashioned glass, muddle together the bitters, water, sugar, cherry and orange slice.  If you don't have a muddler, use the back of a spoon.  Add the bourbon and two ice cubes and stir.  Serves one.
Old Fashioneds
A classic accompaniment to a steak is a salad.  During the 1960's,  Thousand Island dressing was a popular condiment that remains a staple today.  My version is a far cry from the super sweet plastic bottled dressing of my youth.  It is savory, with a little twang from fresh lemon zest and subtle heat from red chilies.

Thousand Island Dressing


My secret weapon: My blue ribbon pickle relish

1 Hard boiled egg
1 clove garlic, minced
Generous pinch kosher salt
1/2 cup Mayo - I use Duke's Light
1/3 cup sweet pickle relish - I use my own recipe
zest of a small lemon
juice of one small lemon -  about 3 tbsp.
2 tablespoons ketchup
generous squirt tube chilies or asian chile paste - about 2 tsps.
Ground black pepper to taste

1000 Island - Yum!
Chop up egg and add to large bowl.  Whisk in remaining ingredients, stirring until completely combined.  Store in refrigerator up to 4 days.  I serve it on my Mom's standard combination of iceberg lettuce, sliced cucumber, diced tomato and sliced green onions.  That is the salad of my childhood.  You could use romaine or escarole, but anything like mesclun or field greens would not have the body to stand up to the dressing.  Try it on a burger or turkey sandwich as an alternative to mayo.  Trust me, once you have this, you will never go back to the bottle.

Lastly, we need a sauce for the steak.  Bottled steak sauces are okay, but for a special cut like filet mignon, I prefer to make Bernaise sauce.  Made with egg yolks and butter, Bernaise is a variation of a classic french Hollandaise sauce.  It is very rich, so I only make it a couple times a year as a treat.  Traditionally, the sauce is cooked slowly in a double boiler, but I do not have the patience for that, so I make it in the blender.


Blender Bearnaise

3 egg yolks
2 Tbsp. Tarragon or white wine vinegar
Handful of fresh tarragon
pinch kosher salt
1/2 cup butter - 1 stick


Place the egg yolks and next three ingredients in the blender, pulse a couple times to combine.  In the meantime, melt the butter in the microwave.  Then turn the blender on high and pour in the hot butter in a thin steady stream.  The result is a decadent, creamy sauce that works perfectly with the tender filet.  You can make Hollandaise by leaving out the tarragon and substituting lemon juice for the vinegar. 

Slowly pour the hot butter  in to avoid making scrambled eggs.
Combine these recipes with a perfectly grilled steak and some roasted potatoes and you will be transported to a classic mid-century steakhouse.  Bon appetit!

Monday, November 28, 2011

Oyster Stew Lightened Up

Around this time every year, when the weather gets cold, Tom starts to drop not so subtle hints about one of his favorite winter meals:  Oyster Stew.  As I was tired of turkey, I obliged and made it for him this weekend.

Traditional southern Oyster Stew uses lots of butter and heavy cream.  My version is lighter. I cut back on the fat where I can by using only a ¼ cup of butter and 2% milk.  The results are a creamy, savory soup that feels like a splurge.

Lisa’s Oyster Stew

1 shallot – minced
1 celery stalk – minced
¼ cup butter (1/2 stick)
Heavy splash dry vermouth (You could use dry sherry as an alternative)
3 cups 2% milk (As a life-long skim milk drinker, 2% milk seems rich to me.  If you prefer something richer, please use whole milk and/or half and half.)
8 oz. container shucked oysters
Pinch cayenne pepper (to taste)
1 tbsp. minced parsley
Oysters with their liquor

Melt butter in a 2 qt. saucepan; add shallots and celery and sauté until tender.  Add the   vermouth and continue to sauté for 1 or 2 minutes until alcohol evaporates.  Add the milk and bring just barely to a boil.  Add the oysters with their liquor to the milk. Continue to cook at a simmer until the edges of the oysters begin to curl, about 5 minutes.  Add the cayenne pepper and taste and add salt and pepper as needed.  Stir in the minced parsley and serve.
Oyster Stew with Oyster Crackers

Simple and delicious!  The richness of the butter and milk and the briny flavor of the oysters are a match made in heaven.  This is an easy, satisfying winter weeknight meal when served with a salad and some crusty bread.

Stay tuned, I will be posting some of my favorite recipes for turkey leftovers.

Sunday, November 20, 2011

Twist on a Crabby Classic

Aaaahhhh.....
Every year Tom and I try to get to the Florida panhandle at least once for vacation.  Last year we were forced by the unfortunate situation in the Gulf to relocate our vacation to St. Simon's Island.  St. Simon's is lovely and I had a wonderful time but I am still longing for sugar white sand, warm clear water and fresh Gulf seafood!

The first thing I always order when I go out for that first vacation meal is a Southern classic:  a West Indies Salad.  First created in 1947 by Mobile restaurateur Bill Bayley, it is a staple in many seafood restaurants from northwest Florida to Biloxi.  Delicious and simple, it just screams "Florida!" to me. I have added some chilies and changed the original yellow onion to red onion to give it a little extra bite but have otherwise stuck with the traditional recipe. The end result is a refreshing salad that feels fancy and indulgent.

Best "As Seen on TV" item ever!
Spicy West Indies Salad for 2

1/2 lb. lump crab meat - use lump not claw or back meat
3 tbsp. finely chopped red onion - I use my trusty Slap Chop!
1/4 cup vegetable oil
3 tbsp. apple cider vinegar
Gourmet Gardens tube chilies (see my earlier post from 11/17/11)
1/4 cup ice cold water
Bibb Lettuce


Yum!

In the bottom of a small bowl, spread one half of the of the chopped onion.  Layer the crab on top of the onion.  DO NOT STIR.  Season with kosher salt. Layer the remaining onion on top of the crab.  Combine the oil, vinegar, tube chilies to taste and ice water in a separate bowl.  Pour over the crab and onion and resist the urge to stir.  Cover and refrigerate overnight.  To serve, stir together and using a slotted spoon, spoon it onto Bibb lettuce leaves.  You can use another lettuce if you like, the crab is the star here. 

This dish is perfect for a celebration like Valentine's Day or an anniversary.  Try serving it in a large martini glass lined with the lettuce leaves for a special presentaion.  Tom and I are having it with a grilled steak for a perfect surf and turf dinner.  I hope you try it and enjoy it as much as we do.

Note:  Tom is loving this new blog.  He is reaping the benefits of all my recipe experiments!


Saturday, November 19, 2011

Brine it baby!

Several years ago I discovered what amazing results you can get by simply brining your meats before cooking.  I now brine all of my pork, chicken and turkey.  The results are always juicy and flavorful.  My favorite brining recipe is my Thanksgiving turkey.  It is from B. Smith and it makes, by far, the best turkey I have ever eaten.

Here is the recipe with my added comments:
Recipe: Herb Roasted (Brined) Turkey
By B. Smith
Ingredients
  • 1-1/2 cups kosher salt
  • 1/2 cup sugar
  • 1 teaspoon cayenne pepper
  • 2 tablespoons dried thyme
  • 2 teaspoons ground allspice
  • 1 teaspoon ground cloves
  • 1 teaspoon ground ginger
  • 1 teaspoon coarsely ground white pepper
  • 3 bay leaves
  • 1 18-to-20 pound turkey (I always cook a smaller bird but choose the right size for you)
  • 4 tablespoons (1/2 stick) unsalted butter, softened
  • 1/4 cup olive oil
  • 2 tablespoons chopped fresh thyme
  • 2 tablespoons finely chopped fresh rosemary
  • Salt and freshly ground white pepper to taste
Preparation
The day before cooking, combine salt, sugar, cayenne, dried thyme, allspice, cloves, ginger, white pepper, and bay leaves in a stockpot. Fill pot halfway with water and bring to a boil. Cool to room temperature. Remove giblets and neck from turkey and rinse bird well. Place in cooled spice mixture, breast side down. Refrigerate overnight or up to 24 hours.
To Roast: Heat oven to 425 degrees. Remove bird from brine, gently wipe dry, and bring to room temperature. Combine butter, olive oil, fresh thyme, and rosemary, mixing well. Season turkey generously inside and out with salt and pepper. (I disagree here.  I found that if you do this the drippings are far too salty for gravy.  I found that rinsing the turkey with water and then patting dry with paper towels leaves all of the flavor while avoiding the salt lick drippings.)
Set turkey on a rack in a roasting pan. Rub seasoned butter lavishly over turkey breast and legs. Roast 20 minutes, then reduce heat to 350 degrees and continue to roast, basting every half hour, until temperature reaches 175 degrees or until juices run clear, about 3 hours, Let bird rest 30 minutes before carving.

I have been cooking this recipe for about 10 years and while I think about switching it up ever y now and then, I always come back to this.  I serve it with pan gravy and a sausage cornbread pecan dressing.  You could make it your own by changing up the spices, adding bourbon or apple juice, you name it.  

Every year we go to Tom’s parents for Thanksgiving and then I cook a turkey for the two of us on Saturday.    I will be able to add a picture of this year’s bird next weekend.

Have a Happy Turkey Day!

Thursday, November 17, 2011

Gnocchi Dokey!

Tom came through with one my wish list items for my birthday:  a food mill.  I had been thinking of getting one for years.  There are several canning recipes I have never attempted because I didn’t own one.  The thing that pushed me over the edge was the gnocchi recipe in the new Anne Burrell cookbook.  Every recipe of hers I have ever tried has been fantastic so if she says I need a food mill, I need a food mill.

There are several models of food mills out there ranging in price from $19.99 to $200.  I was not in the market for a pricey model but didn’t want to cheap out either.  In the end, we went with the $50 OXO model.  If I find later on that I love it and want something more substantial, I’ll invest in a more expensive professional grade.


My new mill
 
Throw the food in here and then turn the crank


On to the gnocchi!  Gnocchi are little Italian dumplings made out of various things such as flour, potato, eggs, cheese and spinach.  The gnocchi I started out with are made from potatoes, cheese, flour and eggs.

Potato Gnocchi

Bake 5 large potatoes in a 375 degree oven for 45 minutes to an hour.  When they are done and cool enough to handle, peel off the skins.  Cut into quarters and run them through the food mill to “rice” them.  Spread them on a large baking sheet and allow to cool completely.  If you make your dough with warm potatoes, they will absorb too much flour and be heavy.  I used part of this time to make a Spicy Marinara for the gnocchi (See recipe below).

Potatoes that have been run through the milll

Once the potatoes are cool, combine 2 large eggs with ¾ cup freshly grated Parmigiano reggiano.   Sidebar - Don’t you dare use the stuff in the round green box!  Buy it fresh in the Deli and grate it yourself.   Throw out the green box! 

I have kind of a small working space so I did this next step in two batches but if you have the space you only have to do it once.  Pour the egg & cheese mixture over the milled potatoes and then season with kosher salt.  Sprinkle flour over the mixture starting with a little over a cup, using up to 3 cups.  It depends on the humidity so start out slow.  Begin to work potatoes and flour together with your fingers.  The dough should be moist but not tacky.   If it is feeling tacky, add more flour and continue to work it together.   Form the dough into a large log.

Big dough log and little dough rope
Gnocchi!
Cut 1 inch slices off of the dough log and roll with your hands into ropes.  Cut the gnocchi into ½ inch pieces, dust with flour and put on a baking sheet covered with flour in a single layer.  Gnocchi should be cooked or frozen immediately.  If freezing, freeze them on a baking sheet then put them in a plastic bag and throw them back in the freezer.  They can go directly from the freezer to boiling water.

If cooking immediately, bring a large pot of salted water to a boil.  Drop the gnocchi into the water and cook until they float to the top of the water.  Once they come to the top, cook for 2 to 3 minutes more.    Scoop the gnocchi out of the water, toss with your favorite sauce and top with Parmigiano.

This recipe produced the lightest, fluffiest gnocchi.  Like little clouds.  There is nothing worse than a heavy dumpling hitting the bottom of your stomach. I tossed mine with my Spicy Marinara and served with a simple shrimp scampi.  Yum!

Spicy, Tomato-y Goodness!


These are the only
tomatoes I buy


Spicy Marinara Sauce

Olive Oil
2 Cloves garlic
1 box Pomi tomatoes
Tube Chilies
Fresh basil


Best convenience food ever!
In the produce section

In a large skillet heat a tablespoon or so of olive oil (always Extra Virgin).  Peel and chop the garlic and add to the olive oil and sauté for 1 or 2 minute without browning the garlic.  Over browning the garlic will make it bitter and ruin your sauce.  Add a generous squirt of tube chilies and sauté a minute or so.  Add the box of Pomi chopped tomatoes and check for seasoning, adding kosher salt to taste.  Simmer for about 10 minutes on low to allow the flavor to develop.  Add a generous handful of shredded fresh basil.  Never use dried basil in marinara; it’s just not the same.  Allow to simmer for 2 or 3 more minutes and then you are good to go.  This sauce is good on any kind of pasta and takes no time to make. 


Okay, I'm not a food stylist but hey, it's good!

My first time using my new gadget was a success.  I am dreaming of all the possibilities now:  homemade ketchup in the summer, applesauce in the fall.  This little machine is a keeper!